
Sometimes your application contacts other systems that use XML documents to receive data about orders or Payments and so on. Such critical systems have to make sure that the data is secured and is not altered by any unauthorized party during transmission. One way to do that is Digital Signature.
In this article we will show you how to digitally sign your XML Data and how to verify that this data is not altered by any unauthorized party during transmission.
Using the Code:
To create an application that signs an XML data with X509 Certificate, follow the following steps:
1. Create a new windows application using Visual Studio 2005/2008/2010.
2. Rename Form1 to CertificateForm.
3. Add a ToolStrip control to the CertificateForm and rename it to CertificateToolStrip.
4. Add a ToolStripButton to the CertificateToolStrip and rename it to SignToolStripButtonand set its Text property to Sign.
5. Add a ToolStripButton to the CertificateToolStrip and rename it to VerifyToolStripButtonand set its Text property to Verify.
6. Add a Label control to the CertificateForm and rename it to PlainLabel and set its Textproperty to Plain Text.
7. Add a RichTextBox to the CertificateForm under the PlainLabeland rename it to PlainRichTextBox.
8. Add a Label control to the CertificateFormand rename it to CipherLabel and set its Text property to Cipher Text.
9. Add a RichTextBox to the CertificateForm under the CipherLabeland rename it to CipherRichTextBox.
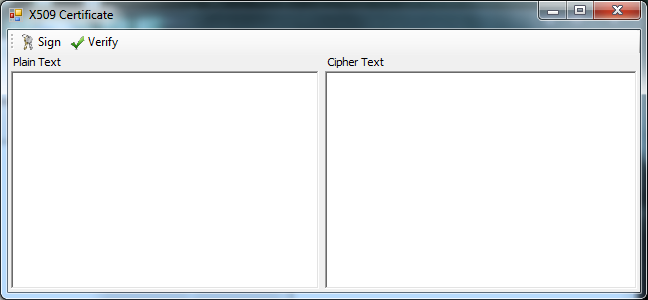
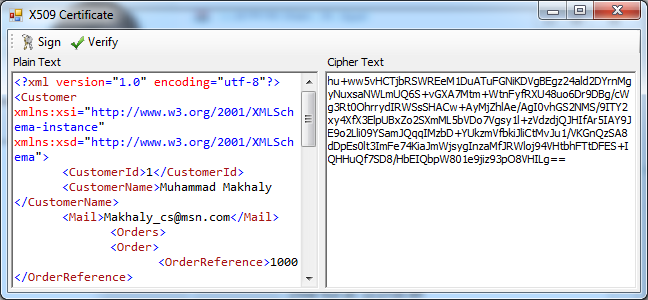
10. The CertificateForm should look like the following Image:
11. Import the System.Security.Cryptography and System.Security.Cryptography.X509Certificates namespaces using the following statement:
using System.Security.Cryptography;
using System.Security.Cryptography.X509Certificates;
12. The System.Security.Cryptography namespace provides cryptographic services, including secure encoding and decoding of data, as well as many other operations, such as hashing, random number generation, and message authentication.
13. The System.Security.Cryptography.X509Certificates namespace contains the common language runtime implementation of the Authenticode X.509 v.3 certificate. This certificate is signed with a private key that uniquely and positively identifies the holder of the certificate.
14. Double click the SignToolStripButton to create the Click Event Handler.
15. Add the following code to the SignToolStripButton Click Event Handler:
private void SignToolStripButton_Click(object sender, EventArgs e)
{
try
{
byte[] plainData, signatureData;
plainData = Encoding.UTF8.GetBytes(PlainRichTextBox.Text);
X509Store store = new X509Store(StoreLocation.CurrentUser);
store.Open(OpenFlags.ReadOnly | OpenFlags.OpenExistingOnly);
X509Certificate2Collection certificates = store.Certificates;
X509Certificate2Collection foundCertificates = certificates.Find(X509FindType.FindByTimeValid,DateTime.Now, true);
X509Certificate2Collection selectedCertificates = X509Certificate2UI.SelectFromCollection(foundCertificates,
"Select a Certificate.", "Select a Certificate from the following list to get information on that certificate", X509SelectionFlag.SingleSelection);
if (selectedCertificates.Count > 0)
{
X509Certificate2 certificate = selectedCertificates[0];
if (certificate.HasPrivateKey)
{
RSACryptoServiceProvider rsaEncryptor = (RSACryptoServiceProvider)certificate.PrivateKey;
signatureData = rsaEncryptor.SignData(plainData, new SHA1CryptoServiceProvider());
CipherRichTextBox.Text = Convert.ToBase64String(signatureData);
}
else
{
MessageBox.Show("the selected certificate does not contain a Private Key to use in signing data",
"No Private Key Available",MessageBoxButtons.OK, MessageBoxIcon.Exclamation);
}
}
}
catch (CryptographicException ex)
{
MessageBox.Show(ex.Message, ex.GetType().ToString(),
MessageBoxButtons.OK, MessageBoxIcon.Error);
}
catch (Exception ex)
{
MessageBox.Show(ex.Message, ex.GetType().ToString(),
MessageBoxButtons.OK, MessageBoxIcon.Error);
}
}
a. We create two arrays of byte type these arrays will hold the plain XML Data and the Signed XML Data respectively.
b. Then we get the binary representation of the Text in the PlainRichTextBox using the UTF-8 encoding.
c. We create an instance of the X509Store class. This represents an X.509 store, which is a physical store where certificates are persisted and managed. We set the store location that exists in the current windows user that the application runs under.
d. Then we open the store with these options ReadOnly and OpenExistingOnly. The OpenFlagsenumeration specifies the way to open the X.509 certificate store.
e. We create an instance of X509Certificate2Collectionand name it certificates, which defines a collection that stores X509Certificate objects. We fill this collection with the certificates in the store we open earlier.
f. We create another instance of X509Certificate2Collection and name it foundCertificates that will store the found X509 Certificates with our search criteria. We fill this collection with X509 Certificates that are not expired in our store. The X509FindTypeenumeration specifies the type of value the X509Certificate2Collection.Find method searches for.
g. We create an instance of X509Certificate2Collectionand name it selectedCertificates that will store the selected X509 Certificates from the X509Certificate2UI Dialog. The X509Certificate2UIdisplays user interface dialogs that allow users to select and view X.509 certificates.
h. We check if the user selects an X509 Certificate from the dialog or not.
i. Then we create an instance of the X509Certificate2. This represents an X.509 certificate. And assign it to the certificate that the users selects from the X509Certificate2UI
j. We check that the selected certificate has a private key; else we display a message box that told the user that the selected certificate does not contain a private key to use in digital signing.
k. We then create an instance of the RSACryptoServiceProvider and name it rsaEncryptor. This will be used to perform asymmetric encryption and decryption using the implementation of the RSA algorithm provided by the cryptographic service provider (CSP).
l. We cast the X509 Certificate Private Key to rsaEncryptor.
m. We call the RSACryptoServiceProvider SignData method and pass to it the binary representation of the Text in PlainRichTextBoxusing the plainData byte array, and a Hash Algorithm. SignData method computes the hash value of the specified byte array using the specified hash algorithm, and signs the resulting hash.
n. We store the signed data in the signatureData byte array created at the beginning of the event handler.
o. Then we convert the signed data to a base 64 string and display it in the CipherRichTextBox.
16. Double click the DecryptToolStripButton to create the Click Event Handler.
17. Add the following code to the DecryptToolStripButtonClick Event Handler:
private void VerifyToolStripButton_Click(object sender, EventArgs e)
{
try
{
byte[] plainData, signatureData;
plainData = Encoding.UTF8.GetBytes(PlainRichTextBox.Text);
signatureData = Convert.FromBase64String(CipherRichTextBox.Text);
X509Store store = new X509Store(StoreLocation.CurrentUser);
store.Open(OpenFlags.ReadOnly | OpenFlags.OpenExistingOnly);
X509Certificate2Collection certificates = store.Certificates;
X509Certificate2Collection foundCertificates = certificates.Find(X509FindType.FindByTimeValid,DateTime.Now, true);
X509Certificate2Collection selectedCertificates = X509Certificate2UI.SelectFromCollection(foundCertificates,
"Select a Certificate.", "Select a Certificate from the following list to get information on that certificate", X509SelectionFlag.SingleSelection);
if (selectedCertificates.Count > 0)
{
X509Certificate2 certificate = selectedCertificates[0];
RSACryptoServiceProvider rsaEncryptor = (RSACryptoServiceProvider)certificate.PublicKey.Key;
if (rsaEncryptor.VerifyData(plainData, new SHA1CryptoServiceProvider(), signatureData))
{
MessageBox.Show("Your signature has been verified successfully.", "Success",
MessageBoxButtons.OK,MessageBoxIcon.Information);
}
else
{
MessageBox.Show("Your Data cannot be verified against the Signature.","Failure",
MessageBoxButtons.OK, MessageBoxIcon.Error);
}
}
}
catch (CryptographicException ex)
{
MessageBox.Show(ex.Message, ex.GetType().ToString(),
MessageBoxButtons.OK, MessageBoxIcon.Error);
}
catch (Exception ex)
{
MessageBox.Show(ex.Message, ex.GetType().ToString(),
MessageBoxButtons.OK, MessageBoxIcon.Error);
}
}
a. We create two arrays of byte type (plainData and signatureData) these arrays will hold the plain XML Data and the Signed XML Data respectively.
b. Then we get the binary representation of the Text in the PlainRichTextBox using the UTF-8 encoding and place it in plainData byte array.
c. Then we get the binary representation of the Text in the CipherRichTextBox by converting it from base 64 string and place it in signatureData byte array .
d. The code in the VerifyToolStripButtonclick event handler is the same as the SignToolStripButton click event handler except for the verification process as the verification of the digital signing uses the Public Key of the X509 Certificate rather than the Private Key.
e. We create an instance of the RSACryptoServiceProvider and name it rsaEncryptor. This will be used to perform asymmetric encryption and decryption using the implementation of the RSA algorithm provided by the cryptographic service provider (CSP).
f. After checking that the user has selected a certificate, we get the Public Key of the certificate using the X509Certificate2 object PublicKey property. We then set the rsaEncryptorto the Key property of the PublicKey property.
g. We call the RSACryptoServiceProvider Verify method and pass to it the plainData, the same Hash Algorithm used in the signing process and the signatureData byte array.
h. If the data has not been changed the certificate verifies the signature against the plain data and we display a message box stating that the signature has been verified successfully.
i. If the data has been changed, we display that; your signature cannot be verified.
Note:In decryption process you should follow the reverse steps of the encryption process.
18. Build and run the application.
How it works:
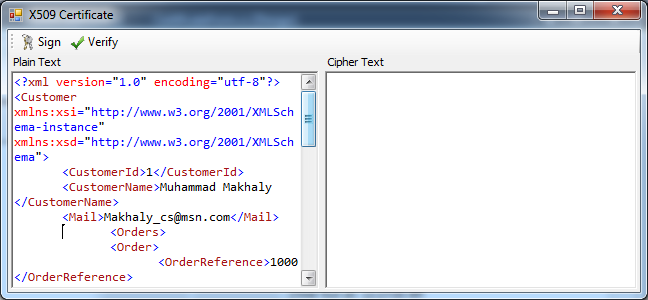
1. Copy any XML document and paste it in the PlainRichTextBox.
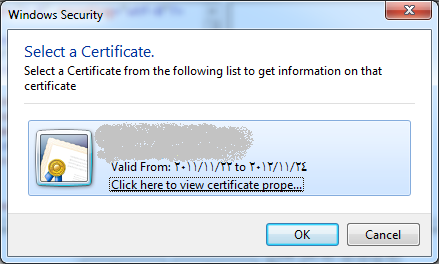
2. Click on the Sign Button and this will display the valid certificates installed on your machine associated with current user.
3. Select one of the displayed certificates.
4. If the selected certificate has a private key the signature of the XML Data will be displayed on the Cipher Textbox.
5. If the selected certificate does not have a private key we could not use it is digital signing.
6. Click Ok you will see the signature of your XML Data in the Cipher Textbox.
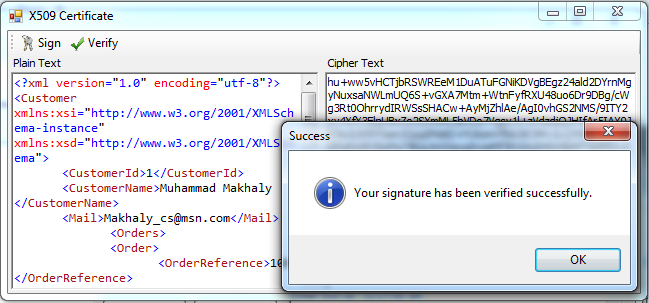
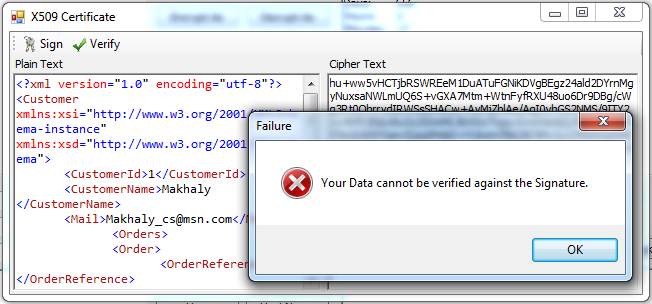
7. Click on the Verify button and select the same certificate used in signing and click Ok. It will display a message box stating that the data has been verified and has not been changed.
8. Remove any characters from the XML Data in the Plain Text Box and click verify again. Select the same certificate used in signing. Click Ok. It will display a message box stating that your Data cannot be verified against the Signature.
Now you have an application that Signs and Verifies your XML Documents with X509 Certificates.
15 March 2022

17 February 2022
09 December 2019